When it comes to luxury SUVs like the Range Rover, air suspension systems make the ride feel so refined. But as smooth as they may seem, these systems are known for being one of the most failure-prone components in the vehicle, especially as the mileage climbs.
It’s not uncommon for Range Rover owners to face air suspension problems after just 70,000 to 100,000 km, with warning signs ranging from an uneven ride height to dashboard error messages.
The most common reasons for air suspension failure include worn-out air springs, leaky airbags, malfunctioning compressors, or faulty ride height sensors. Even minor leaks in the system can lead to sagging suspensions or a total collapse on one or more corners of the vehicle.
These problems can affect ride comfort and compromise safety and handling, especially during high-speed driving or off-road use.
Replacing or repairing the air suspension system yourself or through a suspension repair service in Dubai is critical. Delaying the repair can cause further strain on other parts like the tires, chassis, or steering system. In some cases, it may even result in complete suspension failure, leaving the car undrivable.
To help you avoid that scenario, here’s a detailed step-by-step guide on correctly replacing your Range Rover’s air suspension.
Step-by-Step Guide to Replacing Range Rover Air Suspension
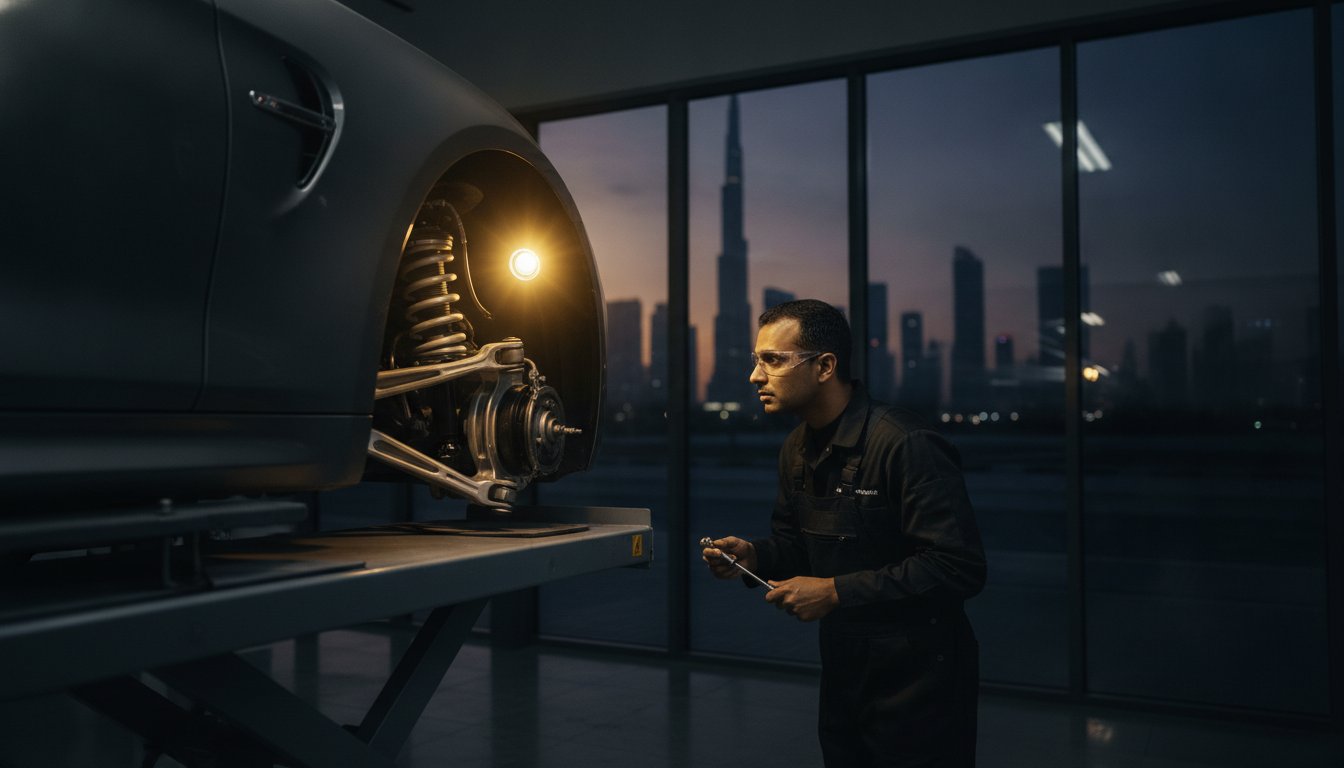
Step 1: Diagnose the Problem
Before starting the replacement process, confirming that the air suspension system is at fault is essential. Use an OBD-II scanner to check for fault codes related to the suspension system.
Visual inspections can also help. Look for sagging on one side, leaking airbags, or an unusually bumpy ride. Knowing exactly what’s wrong ensures you’re replacing the right component.
Step 2: Ensure Safety and Preparation
Start by parking your vehicle on a flat, stable surface and activating the parking brake. Disconnect the battery to avoid any electrical hazards while working on the system.
You should also ensure the suspension is fully depressurized using the onboard diagnostic controls or manually venting the system through the airlines. Skipping this step could result in injury or damage to the vehicle.
Step 3: Raise the Vehicle and Remove the Wheel
Use a hydraulic jack to lift and secure the car with jack stands under the frame. Remove the wheel of the affected corner to access the suspension components.
Always ensure the vehicle is well supported before working underneath. Never rely on Jack alone. This step gives you clear visibility and access to the air strut or spring assembly.
Step 4: Disconnect the Air Line and Electrical Connector
The car air suspension system is connected via both air lines and electrical connectors. Carefully detach the airline using the appropriate tool or wrench, and remove the electrical connector from the air strut.
It’s normal to hear a hissing sound as residual air escapes. Be cautious not to strip or damage the threads of the fittings.
Step 5: Unbolt and Remove the Air Strut
Next, locate and remove the bolts securing the air strut to the chassis and control arm. These are usually held in place by a few large nuts and bolts that may require penetrating oil if rusted.
Once loosened, gently wiggle the strut free from its mounting position. You might need an extra set of hands to safely remove it without damaging nearby components.
Step 6: Install the New Air Suspension Strut
Take the new air strut and align it with the mounting points. Carefully bolt it back into place, starting with the lower control arm and then attaching it to the chassis.
Reconnect the airline and electrical connector, ensuring everything is tightly secured and leaks-free. Double-check all fittings to avoid any air loss once the system is re-pressurized.
Step 7: Reassemble and Lower the Vehicle
Reinstall the wheel and tighten the lug nuts in a crisscross pattern to ensure even pressure. Once the wheel is secure, carefully lower the vehicle back to the ground.
Don’t forget to torque the lug nuts to the manufacturer’s specifications to prevent wheel vibrations or looseness while driving.
Step 8: Reconnect the Battery and Test the System
Reconnect the battery and start the vehicle. Allow the suspension system to re-pressurize and watch for dashboard warning lights or error codes.
The vehicle should level itself and return to the proper ride height if everything has been installed correctly. A short test drive can help confirm that the new suspension is functioning as expected.
Common Mistakes During Air Suspension Replacement (and How to Avoid Them)
It is easy for people to make mistakes while attempting to replace their air suspension. Here are some of those common mistakes and how professionals handle them:
1. Skipping the Diagnostic Step
One of the biggest mistakes is assuming the air strut is the problem without proper diagnosis. This can lead to unnecessary replacements or overlooking the real culprit, like a faulty compressor or a cracked airline.
Always scan for error codes and conduct a full inspection before buying parts.
2. Not Fully Depressurizing the System
Working on a pressurized suspension system is dangerous. Some DIYers skip venting the system, which can result in a sudden release of air that might cause injury or damage to nearby parts.
Always depressurize the system using the vehicle’s diagnostic settings or manual bleed valves first.
3. Using Incompatible or Low-Quality Parts
Trying to save money by buying cheap aftermarket struts or springs can lead to premature failure. Not all replacement parts are built to OEM specifications. Invest in high-quality components for your Range Rover to ensure performance and durability.
4. Over-Tightening Bolts
Torque specs matter. Over-tightening the strut bolts can strip threads or stress the mounting points, leading to alignment issues or even part failure. Always use a torque wrench and refer to the manufacturer’s specs for each fastener.
5. Forgetting to Reset the Suspension System
After replacing the component, failing to reset the suspension system can cause the ECU to continue showing error codes or prevent the system from functioning correctly. Use a compatible diagnostic tool to clear all codes and recalibrate the system if necessary.
Conclusion
Replacing your Range Rover’s air suspension might seem intimidating at first, but with the right tools and patience, it’s a task that can be completed safely and effectively.
Whether you’re dealing with a sagging corner or a total system failure, a properly installed suspension strut can restore your Range Rover’s luxury ride and prevent further wear on critical components.
That said, air suspension systems are complex, and even a small oversight can lead to big problems. If you’re unsure at any stage of the process or want a professional to handle it, it’s best not to take chances.
Need Expert Help?
Let Suspension Repair handle it through our top-notch suspension repair services in Dubai! Our certified technicians specialize in Range Rover air suspension systems and provide top-notch diagnostics, repairs, and replacements using genuine parts.
Book your appointment today and get your ride back to luxury-level comfort and safety.